
Blog Entry 5: Hypothesis Testing

Welcome back everybody! In this blog I will be talking about hypothesis testing and sharing everything that I have learned. 


HYPOTHESIS TESTING

The first thing we should know about is what exactly is hypothesis testing. While it may seem quite obvious from the name itself, it is actually much deeper than what I thought it would be.

Hypothesis testing allows for statistical hypothesis to be proven or rejected through formal procedures.

Statistical hypothesis: an assumption about a population that may or may not be correct.

Hypothesis testing can be used to answer questions such as:

  • Is the new material as strong as the old one?
  • Is the performance of our product enhanced after undergoing the revamp?
  • Is the spare part performing as well as the original part?

In my case I will be conducting an experiment to undergo hypothesis testing for the effects of various factors on a catapult. Frequent readers of my blog will recognise that this is actually the same experiment as my practical for Design Of Experiment.


Conducting The Hypothesis testing

For this experiment, my CPDD practical group have been split into different roles and we will each be conducting hypothesis testing on each of our allocated runs.

Here are our roles and responsibility:

Name of heroes (students)

Runs

Factor tested

Ironman

(Jia Tong)

#1 & #3

Effect of projectile weight

Thor

(Devin)

#2 & #4

Effect of projectile weight

Captain America

(Jun Kai)

#2 & #6

Effect of stop angle

Black Widow

(Aminur)

#4 & #8

Effect of stop angle

Hulk

(Ji Hinn – Me)

#6 & #8

Effect of projectile weight


After allocating our roles, we then proceeded to conduct hypothesis analysis using the data we collected before:


I will be using the data for run #6 and #8 and following the formal procedures to conduct hypothesis!


The Question

To determine the effect of projectile weight on the flying distance of the projectile.

Scope of the test

The human factor is assumed to be negligible. Therefore, different user will not have any effect on the flying distance of projectile.

Flying distance for catapult is collected using the factors below:                                              Arm length = 33 cm                                                                                                                    Projectile weight = 0.88 grams (run #6) and 2.07 grams (run #8)                                              Stop angle = 50 degrees

Step 1: State the statistical hypotheses

Null hypothesis (H0): When the arm length and stop angle of the catapult remain constant at 33 cm and 50 degrees respectively, the distance travelled for projectile weight of 0.88 grams will be the same as a projectile weight of 2.07 grams. 

µ­­6 = µ­­  


Alternative hypothesis (H1): When the arm length and stop angle of the catapult remain constant at 33 cm and 50 degrees respectively, the distance travelled for projectile weight of 0.88 grams will be further than a projectile weight of 2.07 grams.

µ­­6 > µ­­  


Step 2: Formulate an analysis plan

Sample size is 16. Therefore, t-test will be used.

Since the sign of is H1  >, a right-tailed test is used.

Significance level (α) used in this test is 0.05

Step 3: Calculate the test statistic

Mean and standard deviation of run #6    

6 = 196.00 cm                                                                                                                    

S6  =  4.11  cm

Mean and standard deviation of run #8

8  = 174.75 cm

 S8  = 2.87 cm

Computing the value of test statistic (t):


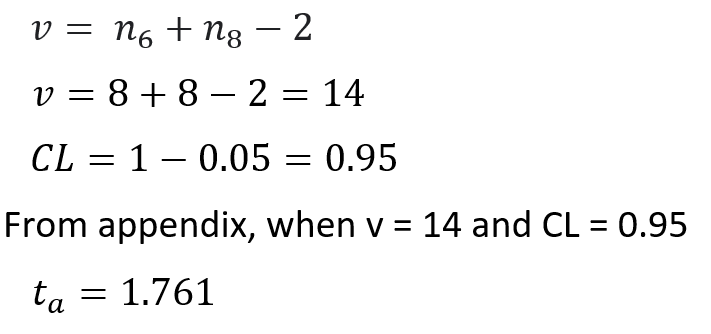
Step 4: Make a decision based on result


Type of test

  1. Left-tailed test [ ], Critical value tα  = 
  2. Right-tailed test [✔], Critical value tα = 1.761
  3. Two-tailed test [ ], Critical value tα/2  = 
Finding tα


Following the diagram above, since t = 11.3 and tα = 1.761, t > tα. Therefore, t lies within the rejection area and His rejected.

Conclusion


When the arm length and stop angle of the catapult remain constant at 33 cm and 50 degrees respectively, as the projectile weight decreases from 2.07g to 0.88g the distance travelled increases.

Comparing conclusions

Ironman (Jia Tong): When the projectile weight is lighter, the flying distance will be longer.

Thor (Devin): Using a lighter Projectile Weight of 0.88grams will result in a further flying distance travelled by the projectile.

Captain America (Jun Kai): Using a bigger stop angle would result in a larger flying distance of the projectile while using a smaller stop angle would result in a smaller flying distance of the projectile.

Black Widow (Aminur): When the arm length is 33 cm and the projectile weight is 2.08 grams, the distance travelled by the projectile using a stop angle of 30 degrees is lower than using a stop angle of 50 degrees.

Hulk (Me): When the arm length and stop angle of the catapult remain constant at 33 cm and 50 degrees respectively, as the projectile weight decreases from 2.07g to 0.88g the distance travelled increases.

Please check out my groupmates' blogs too! Links to all my groupmates' blogs:


Inferences made from conclusions


Weight of projectile have an effect on distance travelled
  • The lower the weight of projectile, the longer the distance travelled

Stop angle have an effect on distance travelled
  • The greater the stop angle, the longer the distance travelled

Learning Reflections

I was first introduced to the term hypothesis by my teacher in secondary school years ago. I had always thought that hypothesis is a simple matter of conducting an experiment for data to prove or disprove the hypothesis. However, I was proven wrong by my teacher during the lesson on hypothesis testing. 

To my surprise hypothesis is much deeper than what I thought. This just shows that there is still a lot of things I do not know and can learn about! I was introduced to a procedure that guided me on how to conduct hypothesis testing. This is the same procedure as the one I used in my experiment above! In the procedure, there were a lot of new symbols and equations that I have never seen before. I was quite worried that I would have to memorise them but thankfully that was not needed.

Despite being overwhelmed at first, as I practiced using the procedure I realised how impressive it was. For example, using the procedure allows comparison between two samples instead of testing a single sample. This opens new opportunities on how I can utilise hypothesis testing. I could remember clearly how I felt I was improving as I practiced using the procedure for the practice questions. So it is extremely rewarding to learn. 

Overall this have been an extremely fun and useful topic that I have learnt. I looked forward to being able to use the procedure again. I am extremely thankful to my teachers and fellow groupmates for accompanying me through this topic.

Thank you for reading until this point, I will be stopping now as its been quite long. please look forward to my next blog! Bye!!


Comments

Popular posts from this blog

ABOUT ME

 Hello everybody!  I am Chang Ji Hinn, in this blog I will be documenting my journey through CP5070, Chemical Product Design & Development. My goal for this module is to hone my skills on creating a chemical product and developing a prototype. I am also looking forward to learning about Arduino programming as this will be my first time being exposed to it. In order to accomplish my goals, I will have to use the available resources on Brightspace to learn about Arduino programming as well as exploring the program and gadgets at my own time. To improve my skills in developing a prototype, I will need to work closely with my team to come up with great ideas on how to improve our product while at the same time cultivating my own skills using 3D printers and laser cutter. I will know that I have accomplished my goals for this module if I am able to fully utilise and understand the coding and uno maker kit for the Arduino programming and having created a design that I am proud o...

Blog Entry 4 - Design Of Experiment

Welcome back everyone! In this blog entry I will be solving a case study using Design Of Experiments as well as sharing my reflections for DOE and the practical I did. What is Design Of Experiment?  It is a statistics-based approach to designing experiments A methodology used to obtain knowledge of a multi-variable process in fewest trials possible It is the backbone of product design Types of data analysis Full factorial data analysis Using data gathered from all possible runs  More accurate due to larger sample size Fractional factorial data analysis Uses data gathered from selected possible runs More efficient and resource-effective Case study In this case study, I will be investigating the cause of the loss in popcorn yield. Three factors have been identified as the possible cause. They are: Diameter of bowls to contain the corn Microwaving time Power setting of microwave In order to determine the impact of each factor, experiments will be conducted with each of ...

Blog Entry 6: Project Development

Welcome back everybody to my final blog! For this blog I will be documenting my group's semester long journey in creating a chemical product. My group consists of Brice, Devin, Yuhan and myself! Our group will be creating a door handle steriliser. 1)  Our team's Chemical Device             Chemical Device: Door handle steriliser Project Background:  Door handles are a significant culprit in the spreading of viruses and bacteria. This is because everyone must touch them to open the door, and they rarely get cleaned since they do not look dirty to the naked eye. Also, most door handles are made of stainless steel, which is a perfect material for bacteria to cultivate on. Some examples of viruses that can spread are the coronavirus (COVID-19), norovirus, hand foot and mouth disease, and influenza.           To emphasise, ever since COVID-19 started, the need for sterilisation tools/equipment/media to minimise its s...